After a little extra time to make sure we got it right, the first version of the Atlas Customizable UI is here! To use it you need the latest version of the Vakaros Connect app, so check to make sure you have it. Then install the latest Atlas FW (0.6.0 beta) onto your device. That’s at the bottom of the app’s main page, under the FIRMWARE section. I’ll wait while you get that set up!
While that’s downloading, let’s have an overview of what the Customizable UI is all about. From the onset, racing instrumentation has had a fixed UI. The device designers had to anticipate what made the most sense, and then craft the UI to match that. This was easier when the devices were simple, but now the situation is different. With instruments displaying data from a wide range of sensors, getting a UI that works best for everyone is impossible. The best you can do is hope to be good for most. And future features or new sensors? Good luck.
All of that is now in the past. With the Atlas Customizable UI, you can have the interface the way YOU want it. And at the launch of the Atlas 2, both Atlas devices will be able have 3rd-party BT sensor data added to their UIs. Again, the way you want it.
Let’s get started. Assuming you have you software all up to date, when you go to the ‘Active Profile Configuration’, you should see these options.
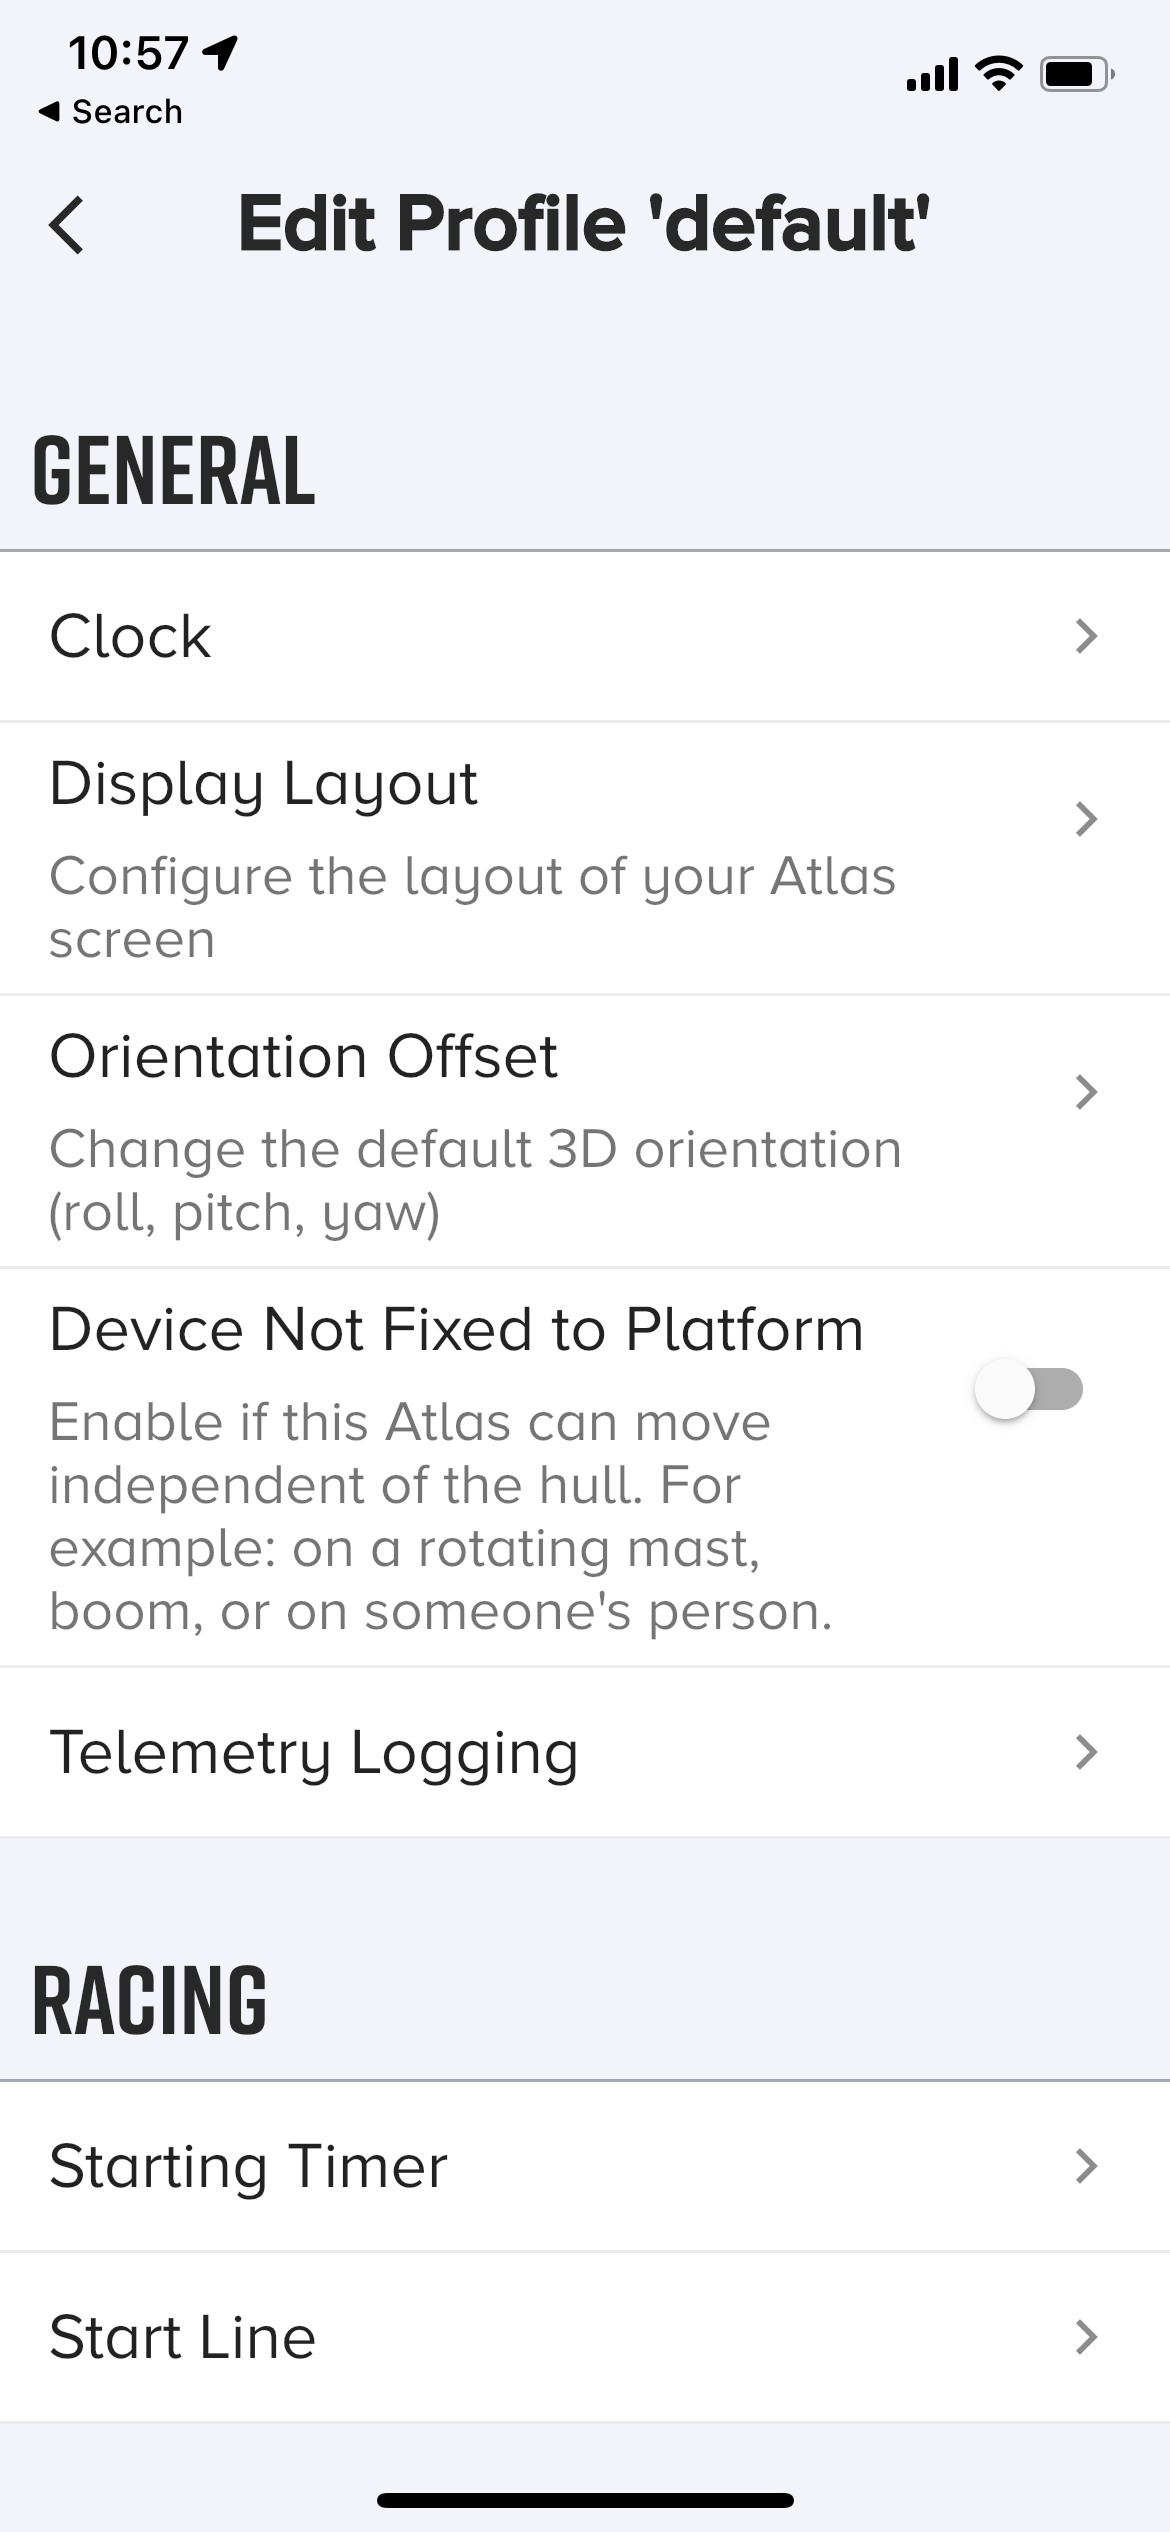

If the option for ‘Display Layout’ is gray, it means you need to update your Atlas software; see the instructions above. If you’re good to go, click on the button, and you are taken to the screen editor. All changes are made in the app, and then sent to the Atlas. Your screen should now look like this:
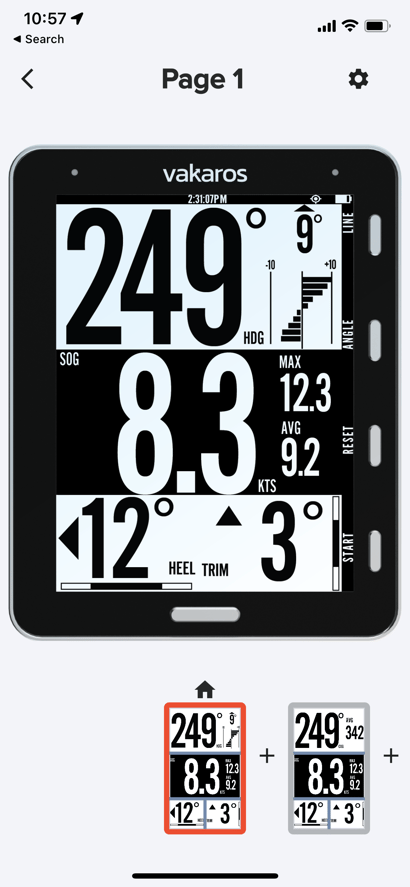
The big image is the editable Atlas page. It’s highlighted at the bottom of the screen on the carousel. Flicking through those images allows you to select a different page to edit, or add a new page in place by selecting one of the arrows. The ‘gear’ button at top right allows you to adjust the setting for the current page.
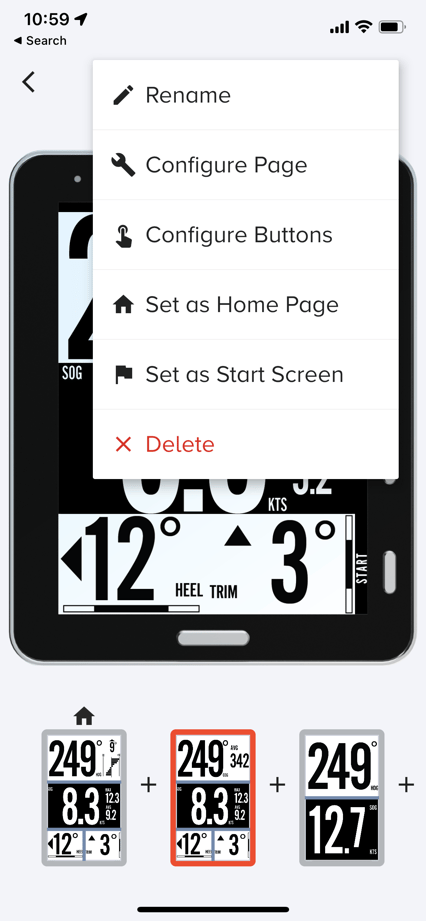
Most of the options are self-explanatory; two deserve an explanation. The ‘Start’ page is the page that the Atlas switches to whenever the start button is pressed. The ‘Home’ page is the page that the device switches to after the gun. Now let’s get a feel of what we can do by making a few changes. Here’s a simple one:
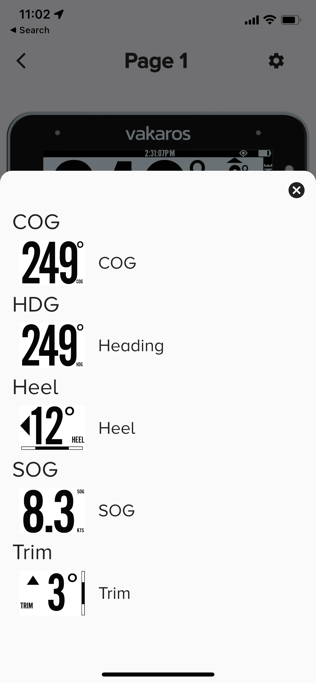
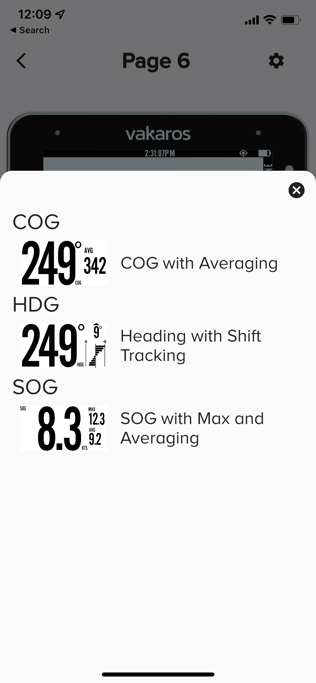
Imagine you love the big digit heading and speed page, but are not so crazy about the reverse color on the speed. Let’s change it. Select the page, and then tap on the speed widget.
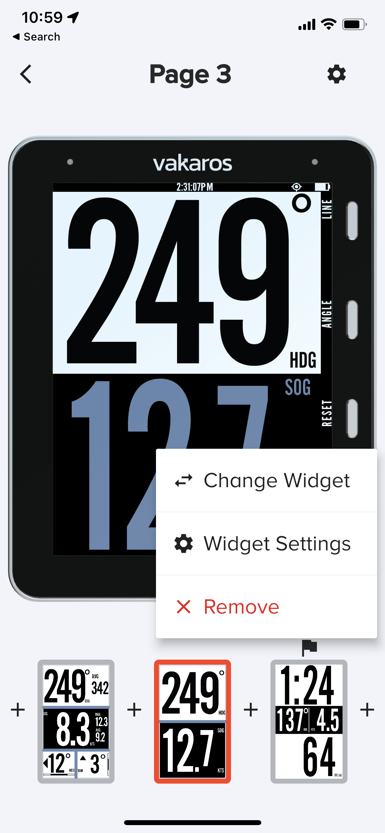
We’ll get to ‘Change Widget’ in a bit, but for now let’s just change it’s settings.
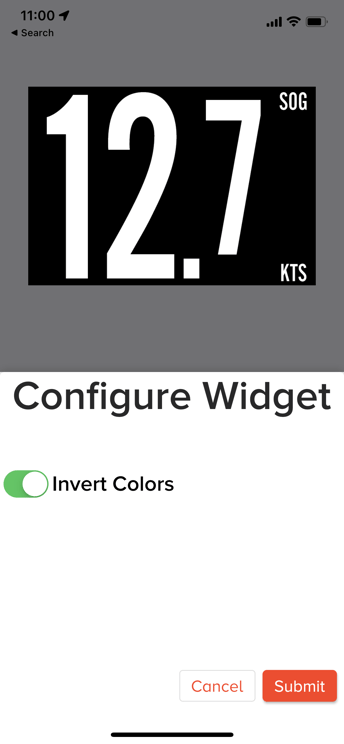
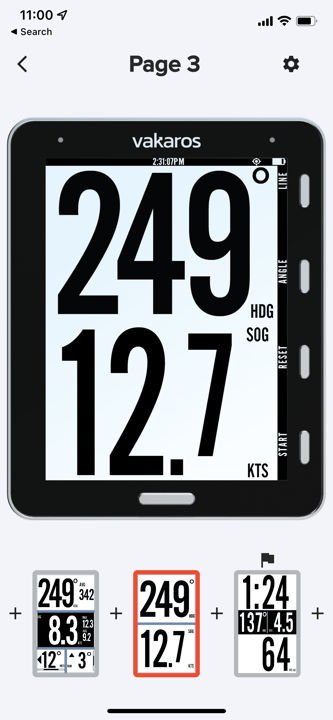
Tap the button to turn off ‘Invert’ and the control switches. Easy.
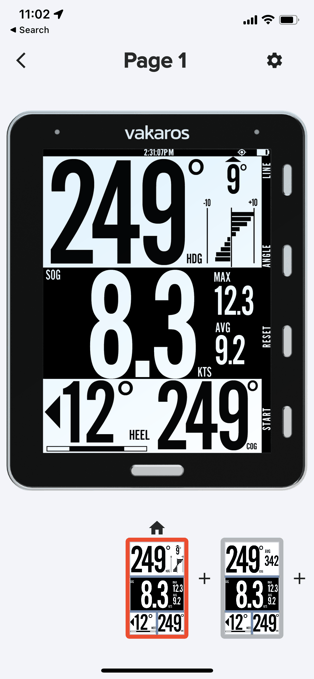
Sorted! Now let’s take it up a level, and swap a widget. On the regular home page, say you’re not a big fan of trim, but COG would be nice there. Let’s make it happen! Flick to the page in question.
And then tap the ‘Trim’ widget. The widget menu appears again, but this time select ‘change’

Doing so brings up the list of available widgets for that size. Each widget size has its own list. For that size, here is the current list. This will grow over time as we add more with each release.
Tap on ‘COG’ and the page updates to show your choice. Nice!
And there is lots more. You can define your own pages. Tapping on the ‘+’ between the pages allows a newly defined page to be placed there. There are two main types. Pre-made pages are the foundation of the built in ones. But of course you can modify them.
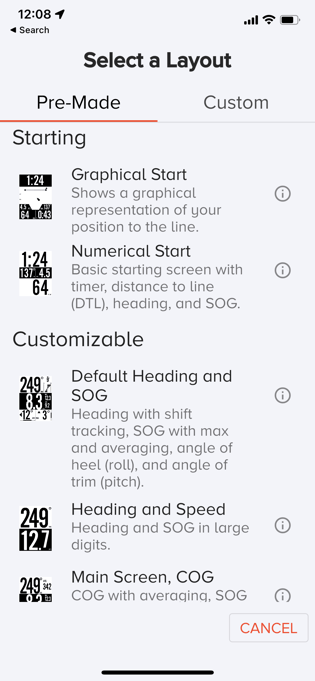
Pressing ‘Custom’ allow you to start from scratch. There are four frameworks to start from. Pick the basic layout and go!
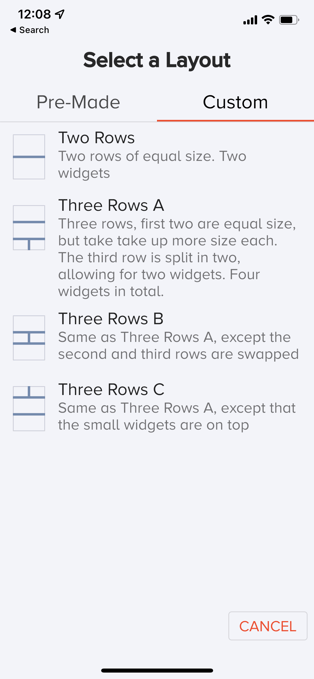
Once you do that, you start populating with widgets. Find out what works best for you and your program. Like before, each type has its own list of widgets, designed for that size.
That should get you started. If you ever don’t like what you’ve done, just don’t save it to the device. That way you are free to explore and not make changes to your Atlas.
The last thing I’ll do is leave you with a glimpse of the future. When the Atlas 2 ships, it will be with the next version of the Customizable UI, also available for the Atlas 1. We’ll have support for 3rd-party BT sensors, and have new widgets that create pages like this.
-1.png?width=2500&height=2500&name=Atlas%202%20Head%20On%20STW+Depth%20(1)-1.png)
Want to get on board? We’re ready.